30 Minute Crochet Projects for Beginners: Six Things You Can Actually Finish in One Sitting
A “30 minute project” can mean very different things depending on who is holding the hook. Someone who crochets every day can finish a coaster in ten minutes. Someone still finding where the hook goes might need forty. So the number on the label doesn’t tell you much unless you know what’s behind it.
Here’s what’s behind it in this guide. Most beginners work at roughly 8 to 15 stitches a minute, and you also need time to count, weave in ends, and sometimes stuff or sew something. So every pattern below stays under about 250 stitches, uses one piece of yarn or two at most, and needs no more than one small seam. That is what makes these 30 minute crochet projects for beginners realistic, not just a nice headline.
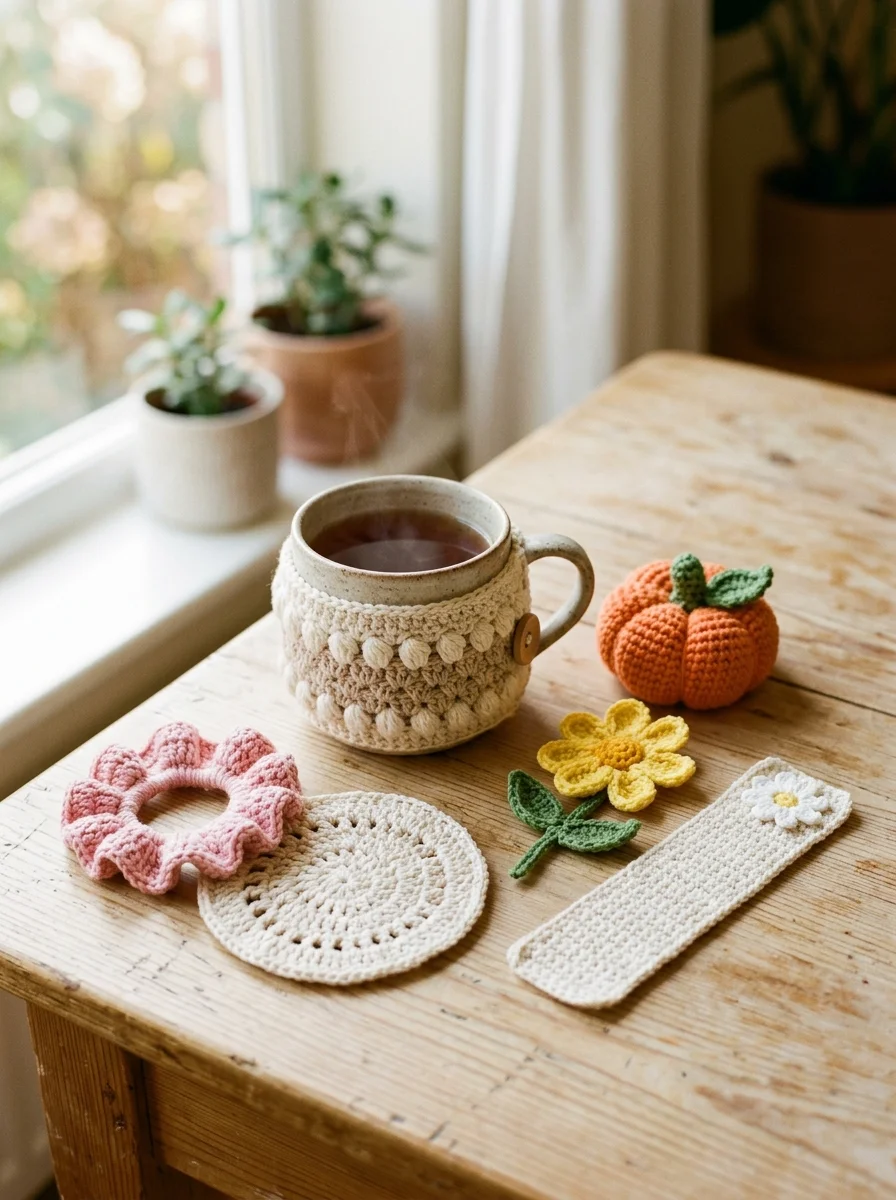
You’ll find six projects, from a flat coaster to a mini pumpkin. Each one includes materials, a round-by-round pattern with stitch counts, and the reason the pattern works. Everything is written in US crochet terms.
Quick answer: If you only make one, make the coaster. It takes about 15 to 20 minutes, uses a single stitch plus increases, and teaches you the circle, which is the base of half the small projects in crochet. Use worsted cotton and a 4.0 mm hook.
What Makes a Crochet Project Finishable in 30 Minutes
Speed in crochet mostly comes down to how many stitches the project needs and how much you have to do after the last stitch. Chunky yarn helps, because each stitch is bigger, but it isn’t the main factor. A tiny project in fine yarn can take longer than a larger one in worsted.
Three things keep a project short. It has a low stitch count, so there’s less to go wrong and less to count. It is worked in one piece, with no panels to join. And it uses one stitch type most of the way through, so your hands settle into a rhythm.
Here is the overview of the six projects:
| Project | Realistic time | Yarn | Hook | New skill |
|---|---|---|---|---|
| Round coaster | 15–20 min | Worsted cotton | 4.0 mm | Increases in a flat circle |
| Ruffled hair tie | 15–20 min | Worsted cotton or acrylic | 4.0 mm | Working around an object |
| Daisy bookmark | 25–30 min | DK cotton | 3.0 mm | Straight rows, plus finishing |
| Mug cozy | 25–30 min | Worsted cotton | 4.0 mm | Half double crochet |
| Mini pumpkin | 25–30 min | Worsted, orange and green | 3.5 mm | Decreasing and stuffing |
| Loop daisy | 5–10 min | Cotton, any color | 3.5 mm | Chain loops |
These times assume you already know how to chain, slip stitch, and single crochet. On your first attempt, expect to take about half as long again. That’s normal, and the second one will be faster. If those three stitches still feel shaky, spend an evening on our guide to the easiest crochet stitch first. It will save you time later.
What You Need Before You Start
The same small kit covers all six projects.
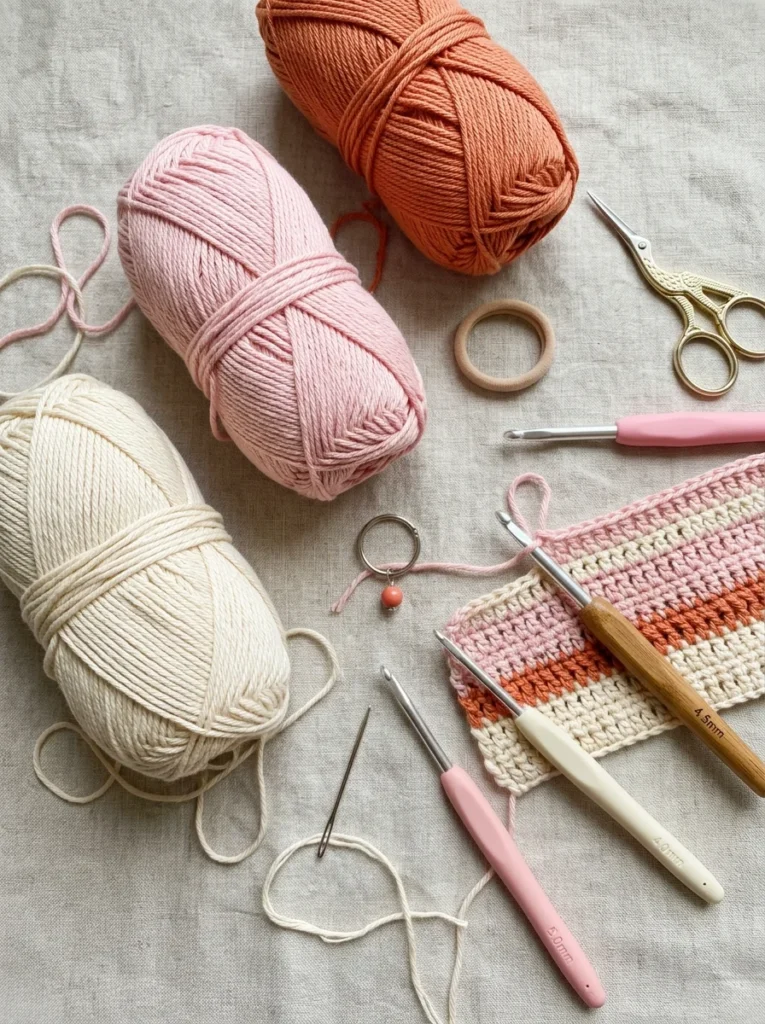
Yarn. Worsted-weight cotton is the best all-round choice here. It holds its shape, shows each stitch clearly, and copes with heat, which matters for the coaster and mug cozy. Acrylic works for the hair tie and pumpkin, but don’t use it for anything that touches a hot mug, because some acrylics soften or melt under direct heat.
Hooks. 3.0 mm, 3.5 mm and 4.0 mm cover everything below. If your first stitches look too tight, go up half a size. If they look floppy, go down.
Notions. A yarn needle, scissors, a stitch marker (a safety pin or a scrap of contrasting yarn works fine), a tape measure, polyester fiberfill for the pumpkin, a plain hair elastic, and a button about 2 cm across.
Abbreviations used below:
- ch = chain
- sl st = slip stitch
- sc = single crochet
- hdc = half double crochet
- inc = 2 sc in the same stitch
- dec = single crochet two together. Insert the hook in the next stitch, yarn over and pull up a loop, insert it in the following stitch, yarn over and pull up a loop, then yarn over and pull through all three loops on the hook.
- st = stitch
If you learned in the UK, note that a US single crochet is a UK double crochet. All terms here are US.
30 Minute Crochet Projects for Beginners: Six Patterns to Try
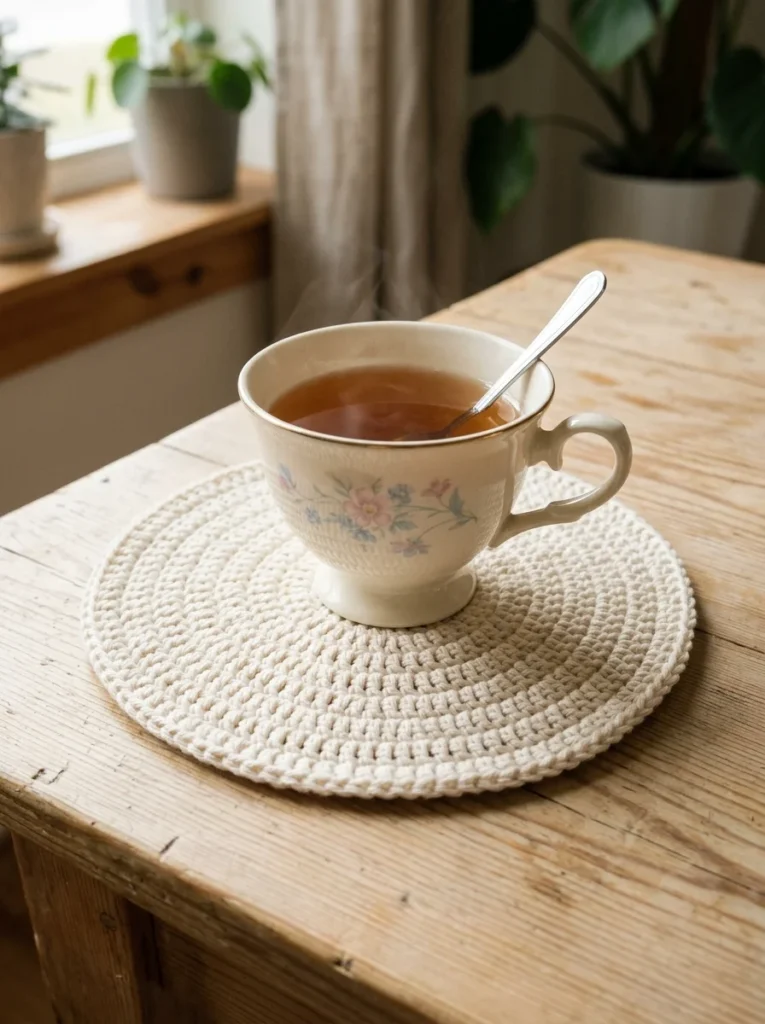
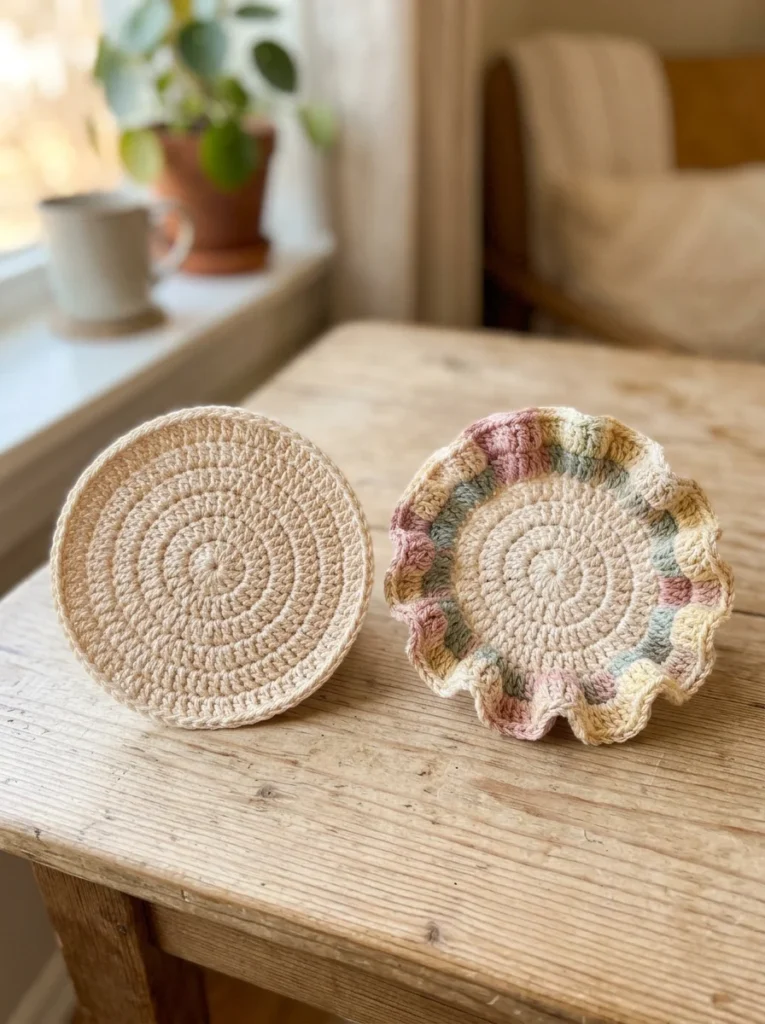
1. Round Coaster (15–20 minutes)
What it teaches: how a flat circle grows. Once you understand this one, you understand the base of hats, bowls, and toys.
Materials: worsted cotton, 4.0 mm hook. The chain at the start of each round does not count as a stitch.
Round 1: Make a magic ring, ch 1, work 6 sc into the ring. Join with a sl st to the first sc. (6 sts)
If the magic ring is giving you trouble, use this instead: ch 2, work 6 sc in the second chain from the hook, and join.
Round 2: Ch 1, work 2 sc in each st around. Join. (12 sts)
Round 3: Ch 1, sc in next st, inc in next st. Repeat 6 times. Join. (18 sts)
Round 4: Ch 1, sc in next 2 sts, inc in next st. Repeat 6 times. Join. (24 sts)
Round 5: Ch 1, sc in next 3 sts, inc in next st. Repeat 6 times. Join. (30 sts)
Round 6: Ch 1, sc in next 4 sts, inc in next st. Repeat 6 times. Join. (36 sts)
Round 7: Ch 1, sc in next 5 sts, inc in next st. Repeat 6 times. Join. (42 sts)
Fasten off and weave in the ends. In worsted cotton on a 4.0 mm hook, this usually comes out around 10 cm (4 in) across, though your own tension will move that a little.
Why it works: each round adds exactly six stitches, and the number of stitches between increases goes up by one each time. That keeps the circle flat. If you add too many, the edge ruffles. Add too few and it cups like a bowl. If yours does either, count your rounds against the numbers above before you blame your hook.
2. Ruffled Hair Tie (15–20 minutes)
What it teaches: working stitches around an object instead of into a chain or ring. It also shows how increases create a ruffle, the same idea behind the rose in our crochet flowers for beginners guide.
Materials: worsted cotton or acrylic, 4.0 mm hook, one plain hair elastic.
Round 1: Make a slip knot and place it on your hook. Insert the hook through the middle of the elastic, yarn over, pull up a loop, yarn over and pull through both loops. That’s one sc worked around the elastic. Keep working sc stitches this way, pushing them snugly together so the elastic is completely covered. Join with a sl st to the first sc. Most standard elastics take between 20 and 30 stitches. Count yours and write the number down.
Round 2: Ch 1, work 2 sc in each st around. Join. (double your round 1 count)
Round 3: Ch 1, sc in each st around. Join. (same count as round 2)
Fasten off, weave in the ends, and you’re done.
Why it works: the elastic sets a fixed circumference, but round 2 has twice as many stitches as the space can hold flat. The extra fabric has nowhere to go, so it bunches into soft, even ruffles. For a bigger scrunch, repeat round 2 once more before the final round. For a neater, tighter look, skip round 3.
Safety note: don’t stretch the elastic hard while you work, and sew in your ends well, because a pulled tail can catch hair.
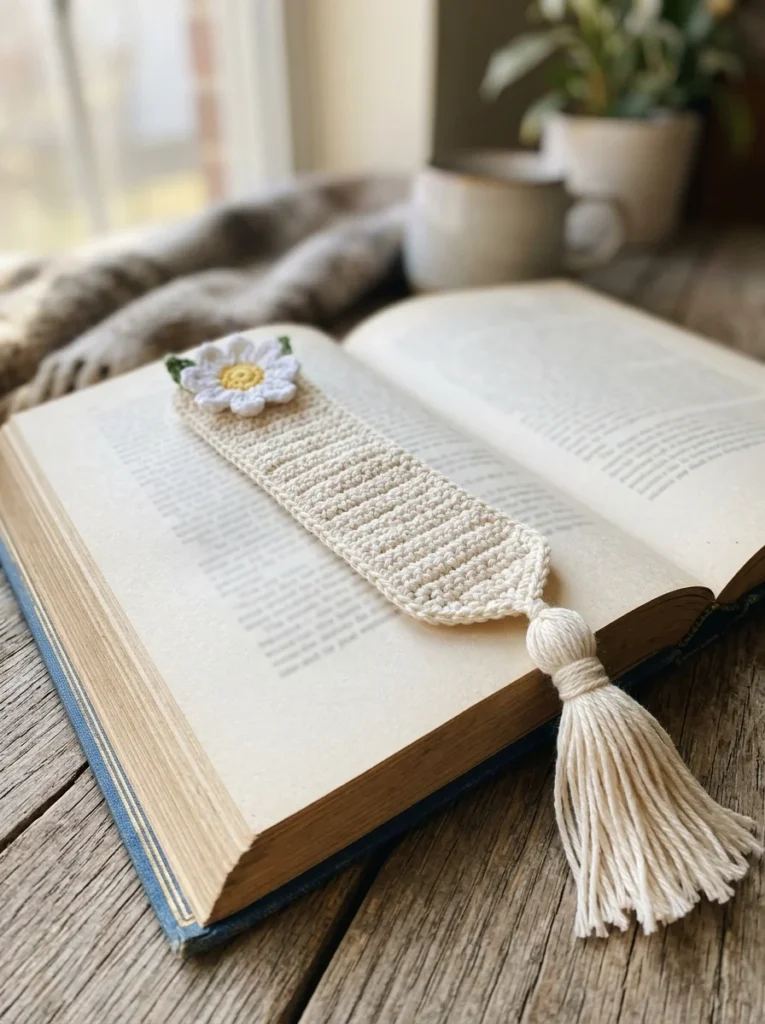
3. Daisy Bookmark (25–30 minutes)
What it teaches: straight rows with clean edges, plus a little finishing. It’s one of the most useful gifts you can make, because almost everyone reads.
Materials: DK cotton in one color, a scrap of a second color for the flower, 3.0 mm hook, yarn needle.
Foundation: Ch 9.
Row 1: Sc in the 2nd chain from the hook and in each chain across. (8 sts)
Rows 2 to 30: Ch 1, turn, sc in each st across. (8 sts)
Keep going until the strip measures about 15 cm (6 in). In DK cotton that is usually around 30 rows, but measure it instead of trusting the row count. Fasten off.
Flower: Make the loop daisy from our crochet flowers for beginners guide. It takes about five minutes. Sew it to the top end of the bookmark, using the tail from the flower.
Tassel: Cut 8 strands of yarn about 12 cm (5 in) long. Fold them in half. Push your hook through the centre of the bottom edge, catch the fold, and pull it through to make a loop. Pull all the tails through the loop and tighten. Trim the ends evenly.
Why it works: working into the same 8 stitches row after row keeps the edges straight. If your strip curves like a banana, your tension is changing between rows. Slow down for the first stitch of each row, since that’s where it usually tightens.
4. Mug Cozy (25–30 minutes)
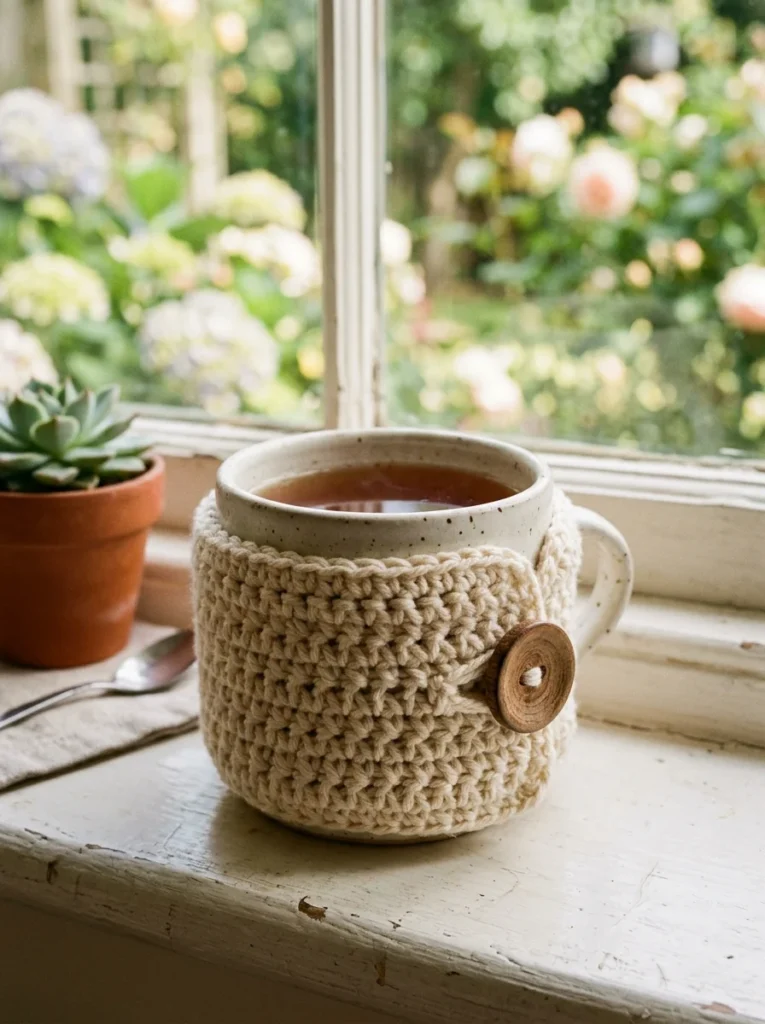
What it teaches: half double crochet, the slightly taller stitch that gives fabric a softer drape than single crochet. It also teaches you to measure a project against a real object, which is a habit worth building early.
Materials: worsted cotton, 4.0 mm hook, one button about 2 cm across, yarn needle.
Foundation: Ch 30. Before you go on, lay the chain against your mug so it reaches from one side of the handle around to the other. It should reach with only a slight stretch. Add or remove chains if it doesn’t, keeping in mind that each chain you add or remove changes the stitch count below by one.
Row 1: Hdc in the 3rd chain from the hook and in each chain across. The two skipped chains count as your first stitch. (29 sts)
Rows 2 to 6: Ch 2 (counts as your first hdc), turn. Skip the first stitch and work hdc in each stitch across, with the last hdc worked into the top of the turning chain from the row below. (29 sts)
Button loop: After row 6, don’t fasten off. Ch 8, sl st in the same stitch as your last hdc, then fasten off.
Finishing: Weave in the ends. Sew the button to the opposite short edge, on the top row and level with the loop. Wrap the cozy around your mug and fasten it.
Why cotton, and a warning: cotton tolerates warmth from a hot drink much better than most acrylic. Even so, take the cozy off before you microwave the mug. Yarn and buttons don’t belong in there.
5. Mini Pumpkin (25–30 minutes)
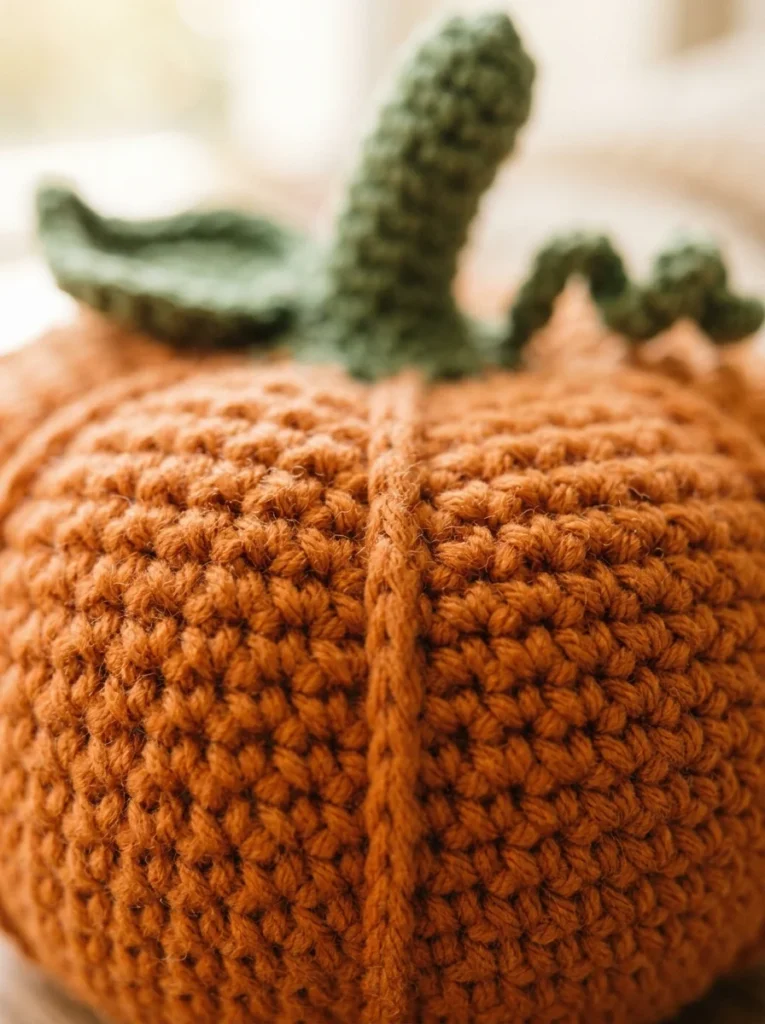
What it teaches: decreasing, and how stuffing gives a flat piece its shape. This is the smallest introduction to amigurumi, the Japanese art of crocheted stuffed shapes, and a good stepping stone to the projects in our amigurumi patterns free collection.
Materials: worsted yarn in orange, a small amount of green, 3.5 mm hook, polyester fiberfill, yarn needle, stitch marker.
Work in a continuous spiral, meaning you don’t join rounds or chain at the start. Place a marker in the first stitch of each round and move it up as you go. Use a magic ring, or ch 2 and work 6 sc in the second chain from the hook.
Round 1: 6 sc in a magic ring. (6 sts)
Round 2: Inc in each st around. (12 sts)
Round 3: Sc in next st, inc in next st. Repeat 6 times. (18 sts)
Round 4: Sc in next 2 sts, inc in next st. Repeat 6 times. (24 sts)
Rounds 5 to 8: Sc in each st around. (24 sts)
Round 9: Sc in next 2 sts, dec. Repeat 6 times. (18 sts)
Round 10: Sc in next st, dec. Repeat 6 times. (12 sts)
Stuff the pumpkin firmly now. It gets harder to add stuffing after the next round.
Round 11: Dec 6 times. (6 sts)
Fasten off, leaving a tail. Thread the tail through the front loops of the last 6 stitches, pull tight, and weave the end in.
Ridges: Thread a 60 cm (24 in) length of orange yarn onto your needle. Bring it up through the bottom centre and out through the top, then wrap it around the outside and back to the bottom. Repeat five times, pulling snug each pass, then tie off at the bottom. The wraps pinch the pumpkin into segments.
Stem: With green yarn, ch 5. Sl st in the 2nd chain from the hook and in each chain across. (4 sl sts) Sew the stem to the top centre.
Why it works: the decreases pull the stitch count back down so the top closes, and the stuffing holds the round shape in between. The pumpkin ends up about 6 cm (2.5 in) across.
Safety note: this pattern has no small parts, but if it’s going to a young child, sew the stem on very securely or leave it off. The U.S. Consumer Product Safety Commission has guidance on small parts for children’s items.
6. Loop Daisy (5–10 minutes)
The fastest project on this list is also the one to turn to when you need a small handmade extra. The full round-by-round pattern is in our crochet flowers for beginners guide, so you’ll find it there without repeating it here. It uses only chain, single crochet and slip stitch. Sew one onto a hair clip, a tote bag, a card, or a gift.
How to Choose Your First Project
If you’ve just learned to single crochet, start with the coaster. It has the fewest surprises. If you’d rather make something you can use straight away, pick the hair tie. If you’re comfortable with the stitches and want a gift, go for the bookmark or the mug cozy. And when you want to try a taste of amigurumi, the pumpkin is a gentle way in.
Don’t try to make all six in one afternoon. Two projects in a sitting is plenty. The second is nearly always faster and neater than the first, and that’s how you notice you’re improving.
Ways to Work Faster Without Making Worse Stitches
Rushing the stitches themselves is a poor way to save time, because you’ll pull out more than you gain. What helps is preparation. Wind or pull out enough yarn before you start so you’re not fighting a tangle mid-round. Keep your stitch marker in place from the beginning. Count at the end of every round, since finding a mistake early takes seconds and finding it three rounds later takes minutes.
Choose smooth yarn. Fluffy or dark yarn hides your stitches, which slows you down whenever you need to find the next one. And when you spot a mistake in the current round, undo it straight away. Leaving it there almost always costs more time than fixing it.
Troubleshooting Quick Projects
- Coaster ruffles at the edge: you likely added extra increases somewhere. Compare each round’s stitch count to the pattern.
- Coaster cups upward: you may have missed increases, or your tension is too tight. Try a hook half a size larger.
- Hair tie stitches twist: make sure you insert the hook through the middle of the elastic every time, not around one side of it.
- Bookmark curves: your tension is changing between rows. Slow down at the start of each row.
- Mug cozy is too snug: add two chains to the foundation and recheck. A cozy that’s a touch loose is better than one that won’t close.
- Pumpkin looks lumpy: it needs more stuffing before you close it. Stuff in small pieces, and push them into the corners with your hook’s handle.
Where to Go Next
Once these feel easy, the next step is to build on what you’ve learned. Our free crochet patterns for beginners guide collects more projects sorted by difficulty. If you enjoyed the pumpkin, the amigurumi bunny pattern uses the same magic ring and decreases in a longer project. For texture, try the crochet waffle stitch. And when you feel ready for something bigger, our free crochet blanket patterns and unusual granny square crochet patterns guides are the natural next step.
Questions Beginners Ask About Quick Crochet Projects
Can a complete beginner really finish a crochet project in 30 minutes? Yes, if it’s a small one. The coaster and hair tie are realistic for a first-timer, though your first attempt may run longer as you get used to the stitches.
What is the fastest thing to crochet? A simple flower, at about five minutes once you’ve made one. Next fastest is a coaster or a hair tie.
What yarn is best for quick projects? Smooth worsted cotton. It shows stitches clearly and holds its shape. Chunky yarn is faster, but you’ll need a bigger hook and the projects come out larger.
Which of these makes the best gift? The bookmark and mug cozy are the most practical. The pumpkin works as a seasonal decoration.
Do I need to block these projects? For the coaster, a light steam or a damp press helps it lie flat. The other five don’t need it.
Why does my crochet circle ruffle or cup? The number of increases is off. A flat circle adds exactly six stitches per round.
Final Thoughts on 30 Minute Crochet Projects for Beginners
Short projects earn their place. They give you a finished object while your attention is still fresh, and each one teaches a specific skill you’ll use again: circles, working around an object, straight rows, a taller stitch, decreases. None of that needs a big commitment.
Pick one that suits what you can already do, make it, then make it again. That second time is where the improvement really shows.
One Comment